I did consider leaving the brick exposed but the mortar was in bad shape and decided to skip expending time and resources on revamping it.
A close up of the window and the shelves that have been framed in the shower.
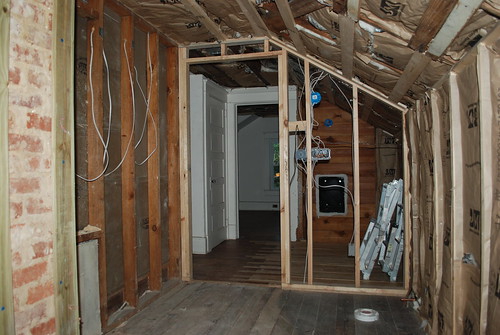
Standing in bathroom looking toward door and hallway. Â You can see the ring for the toilet on the floor on the right.
-
Challenge #1– How to best position the shower?This room is long and fairly narrow but the challenge is the slanted ceiling. Â We had to restructure the entire bathroom and really part of the upstairs hallway to get the room you are looking at now. We had to carve out a space in the room for a shower. Our first design included a clawfoot tub along the slanted wall and then the shower stall against the right side of the room, eliminating the window and adding a large skylight. The final design is a tub/shower combination at the far end of the room.
-
Challenge #2– Where can we put the toilet?We are required by code to have a certain amount of vertical inches from the front of the toilet to the ceiling. Â Normally this wouldn’t be an issue but in a room with a slanted ceiling it quickly becomes a problem. The inspector was asked to come and consult with us on our preferred spot for the toilet. He agreed to allow us to put it where we wanted to because it was a remodel and it had previously been a bathroom. If it would’ve been a new house, the inspector wouldn’t have given us as much leeway. Â Even after we placed the toilet, the challenge wasn’t over. Â The plumbing has to tie in to the sewer so it has to travel down to the lower level. Â The position of the toilet routed the pipe through the downstairs hallway ceiling. When this happens you have to build a box to house the plumbing. In order to make this box make visual sense, the carpenter built a tray ceiling in the downstairs hallway–problem solved.

Some of you might be interested in some other details,
-
The window is vinyl clad with obscured glass. Â The window itself will not be affected by shower water. The window will be trimmed in composite material that will not rot and then painted. Â We may choose to apply a water resistant epoxy, which we’ve had a lot of success with in the past.
-
A custom, frameless glass door will be fabricated to shield the floor from splash.
-
I’ve already purchased the American Standard rain can, extension arm, faucet, shower controls and tub filler from Hubbard plumbing supply. I also bought the Aquaglass unskirted tub at Hubbard’s as well.  I did compare prices at Lowe’s and Hubbard’s because I knew Lowe’s carried the Aquaglass brand. Hubbard’s came out lower and they stock the particular tub I needed, no special order necessary. The side of the tub that is visible in the room will receive a custom wooden paneled front built by the carpenter. As plain as this tub might seem to those of you that are designers or cruise shelter mags or design blogs on the reg, it was still $500.00. Trust me, if it was in the budget I would install a $1500-$3000 soaking tub.
-
There are four 4″ recessed lighting cans in the ceiling in addition to the sconces.
Fixture Sources:
Vanity, Home Decorators
Hexagon floor tile, Overstock
Subway tile, American Universal
Sconces, Lighting Universe
Grohe faucet, Overstock (sold out)
Rain shower head, Faucet Depot
Wooden mirror, Overstock (I purchased ours at Home Goods)
Towel hooks, IKEA
Right now I’m leaning towards Benjamin Moore’s Chantilly Lace for the wall color. I like to test the color out in the room so I’ll finalize the choice once I take the fan deck over and observe it in the room. The trim will be oil based, semi-gloss white and the ceiling will be white.






Wow! Im soo excited to see the finished project!